
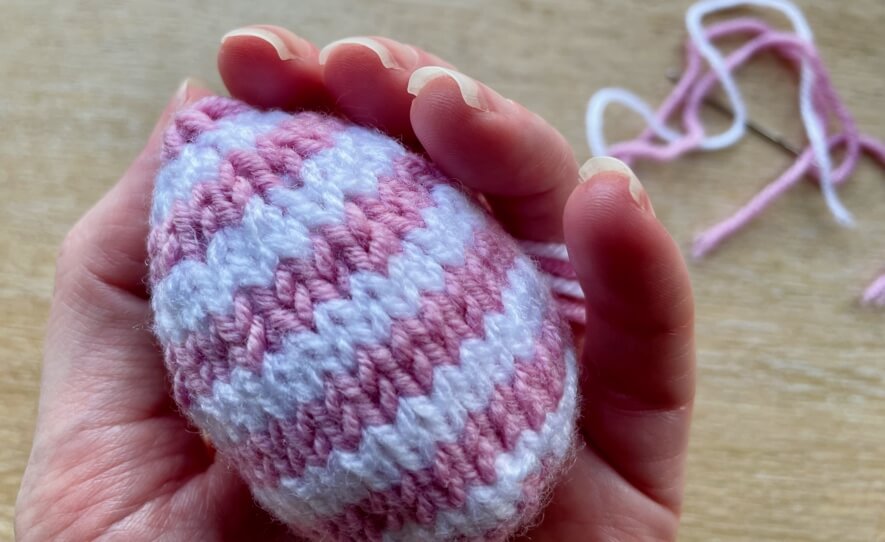
Here’s the flat knit version of my free easter eggs knitting pattern which you can knit with 2 straight needles. You seam the sides together at the end and stuff to make an egg shape.
If you would like to knit seamless eggs with no fiddly sewing up, check out the original knit easter egg decorations in the round pattern instead.
You only need a small amount of yarn, so this is perfect for using up scraps of leftover wool or cotton. These decorations are quick to make, so ideal for some last minute Easter crafting too.
Table of Contents
Materials & Notes
- 3.5mm / size 4 US knitting needles with a small amount of DK yarn. I used Drops Merino Extra Fine in shades 25 pink and 26 pistachio.
OR 4mm / size 6 US knitting needles with a small amount of worsted or aran yarn for a slightly larger egg (e.g. purple striped egg in pictures). I used off-white Drops Karisma with some aran scraps. - Polyester toy stuffing or you could stuff with wool etc if you prefer.
- Tapestry needle for gathering the ends & weaving in ends.
If you want to make optional hanging loops for your eggs, you will also need:
- Either a 3mm (size D) crochet hook OR 2 3mm (size 2.5 US) double pointed needles.
- Scraps of 4 ply yarn. I used Drops baby merino. Heavier weight yarn will do but makes a chunkier loop.
Tension is not important here so you can use any weight yarn. Your egg will just be a slightly different size. Make sure you change the needle size too. I suggest using a needle a bit smaller than the standard size stated so your stuffing won’t show through the egg.
Abbreviations
- R: row
- Kfb: knit into the front and back of the stitch (increase 1 stitch)
- K2tog: knit 2 stitches together (decrease 1 stitch)
- P2tog: purl 2 stitches together (decrease 1 stitch)
Easter egg pattern – short version
For more experienced knitters, here’s the basic shorthand pattern version for a plain egg. For a striped egg, just change color every 2 rows. Or scroll down or jump straight to the full pattern with more explanation.
- Cast on 8 stitches for bottom of egg, leaving a long tail for sewing up later.
- R1: Purl 8
- R2: Kfb x 8 [16 stitches]
- R3: Purl 16 (in color 2 for striped egg)
- R4: (K1, Kfb) x 8 [24 stitches]
- R5: Purl 24 (in color 1 for striped egg)
- R6: (K2, Kfb) x 8 [32 stitches]
- R7-15: Starting and ending with a purl row, work 9 rounds even of stockinette.
- R16: (k2, k2tog) x 8 [24 stitches]
- R17-18: work even (purl row, knit row)
- R19: (p1, p2tog) x 8 [16 stitches]
- R20-21: work even (knit row, purl row)
- R22: (k2tog) x 8 [8 stitches]
- Leave a long length & cut yarn. Thread it through the 8 stitches & gather to form pointed top of egg.
- Start to seam your edges together from this top point down about 1/3 the egg using mattress stitch.
- Thread your needle with the cast on end, run it in & out through the 8 stitches and gather to close. Now seam up from this end about 1/3 way using mattress stitch.
- Stuff your egg well through the gap in the middle. Once you have a nice plump egg shape, seam the gap closed with a final bit of mattress stitch and weave in the ends.
Flat knit easter egg pattern – full version
NB to knit a striped easter egg, change color every 2 rows.
How to knit an Easter egg (flat)
Total Time: 1 hour and 30 minutes
Cast on 8 stitches for the base of the egg
Leave a long tail for gathering the end and seaming later. Any cast on method is fine. I used a basic knit cast on.
Row 1: purl 8 stitches
Row 2: kfb each stitch [16 stitches]
Knit into the front and back of each stitch to increase from 8 to 16 stitches. Alternatively use your preferred increase method instead.
Round 3: purl 16 stitches
If knitting a striped egg, start color 2 here and switch color every 2 rows for the rest of the pattern.
Row 4: (k1, kfb) x 8 [24 stitches]
Knit into the front and back of every 2nd stitch to increase from 16 to 24 stitches.
Row 5: purl 24 stitches
If making a striped egg, switch back to color 1 here. Keep changing color every 2 rows for the rest of the pattern.
Row 6: (k2, kfb) x 8 [32 stitches]
Knit into the front and back of every 3rd stitch to increase from 24 to 32 stitches.
Row 7-15: work 9 rows even at 32 stitches
Starting and ending with a purl row, work 9 rows even of stockinette stitch, alternating between knit and purl rows.
Row 16: (k2, k2tog) x 8 [24 stitches]
Knit 2 stitches, then knit the next 2 stitches together. Repeat this around to decrease from 32 to 24 stitches.
Row 17-18: work 2 rows even at 24 stitches
Do a purl row and a knit row at 24 stitches.
Row 19: (k1, k2tog) x 8 [16 stitches]
Knit a stitch, then knit the next 2 stitches together. Repeat this around to decrease from 24 to 16 stitches.
Row 20-21: work 2 rounds even at 16 stitches
Do a purl row and a knit row at 24 stitches.
Row 22: k2tog x 8 [8 stitches]
Knit 2 stitches together around to decrease from 16 stitches to 8.
Cut yarn & close hole at top of egg

Cut yarn leaving a long tail and thread with a tapestry needle. Pass the needle through the 8 remaining stitches and gather to close hole at top of egg. Run the needle round the stitches a second time to secure.
Seam the top 1/3 of the egg sides together

With the same needle & thread length, working from the top point, start to seam the sides of your egg together. Work about 1/3 of the way down and use mattress stitch for the neatest finish. To work mattress stitch, skip the first stitch column at each edge and stretch your knitting and look for the column or ladder of horizontal bars between your knitting stitch columns (see close up in picture above). Start on one side & put your needle through under the first bar. Repeat on the other side. Keep going and pull your seam tight after every few stitches and it should more or less disappear. The magic of mattress stitch! Here’s a clear video demo of mattress stitch so you can see how it works.
With the increases it’s not always obvious where to put your needle near the top end, but your best guess will be fine – don’t worry about it! For striped eggs, try to match the color of the bar you put your needle under on each side to align your stripes.
Close the base of the egg and seam the bottom 1/3 of the egg

Now thread the cast on end with your tapestry needle and pass it in and out through the 8 cast on stitches and gather them to close the egg base. Run the needle through them again to secure. From here, use mattress stitch to seam from the bottom. Stop about 1/3 way up the egg.
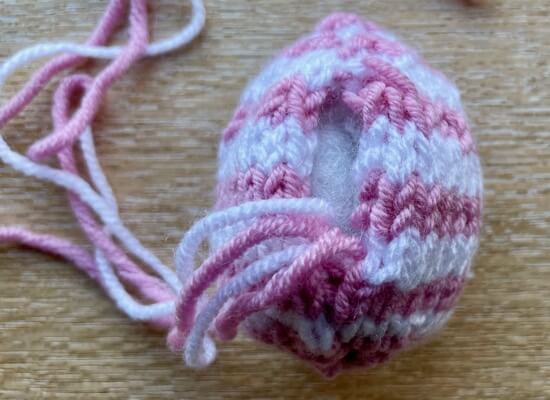
Stuff the egg well

Taking care to leave your yarn ends on the outside, stuff the egg well through the gap in the middle of your seam. Add plenty of stuffing so your egg has a nice plump shape in your hand. Once happy, close the rest of the seam with mattress stitch using one yarn end. Weave in both ends.
Add a loop to hang your egg
You can display your egg decorations in a basket or bowl. They will also stand upright with a bit of patience if you press them down slightly and let them settle on their base.
If you would like to hang your eggs on an Easter tree, it’s easy to knit or crochet a hanging loop. Alternatively, you could sew on some pretty ribbon or twine string.
How to crochet a hanging loop
If you can crochet chains, this is the quickest way to hang your decorations.
It looks nice and neat too, especially using 4 ply yarn. But whatever you have to hand will work. Just use the recommended hook size or slightly smaller.
- Using 4 ply yarn and a size D (3mm) crochet hook, insert your hook through your egg around the top point. Leave a long yarn tail for weaving in to your egg at the end. Yarn over hook and pull a loop of yarn back through to you.
- Make 30 chain from here, or double the length of your desired loop.
- Slip stitch to the starting point to secure. Knot both ends of loop yarn together and weave into the egg.

How to knit a hanging loop
If you don’t crochet, you can knit a nice loop instead by making an i-cord. Finer 4ply yarn works best for making a nice delicate loop, but you can use the same DK yarn you knit your egg with either.
I’ve a full step by step guide for how to knit i-cord (with video demo) here, which includes instructions for knitting i-cord hanging loops for easter eggs & other decorations.

I hope you enjoy knitting some little easter eggs. Please leave a comment below if you have any questions on the pattern.
This free pattern is for personal, non-commercial use only. It may not be copied, sold, translated or distributed in any way, nor any finished items made using it sold, without permission.
